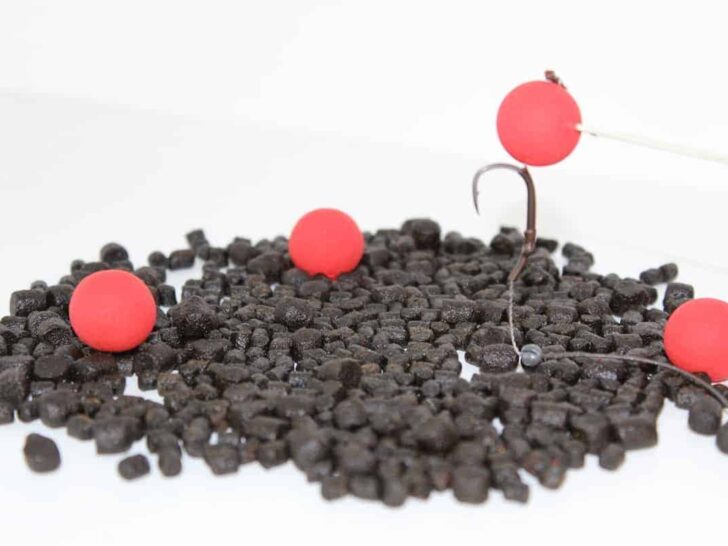

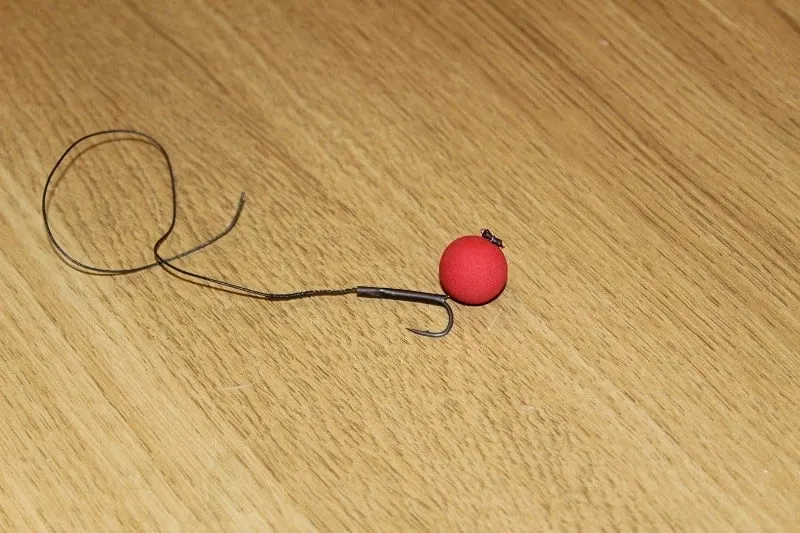
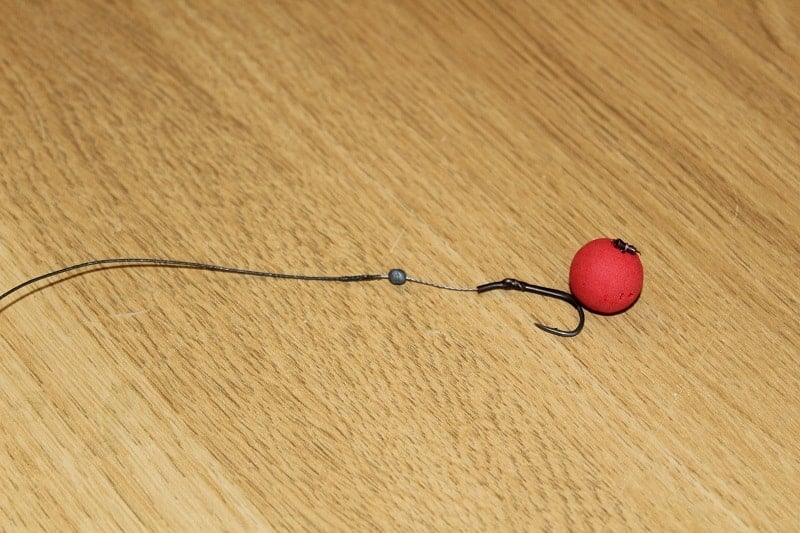
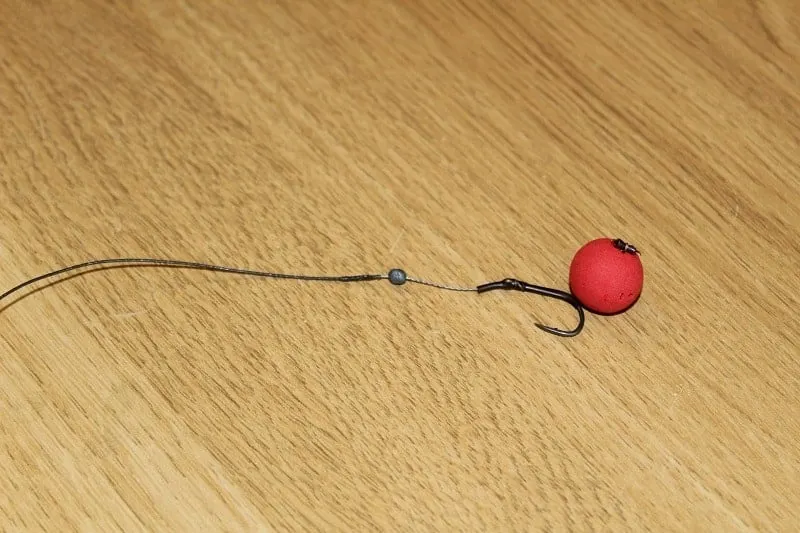
The classic pop-up rig is one of carp fishing’s most effective rigs of all time! I have been using this amazingly simple rig for many years now and wanted to show you exactly how to tie a pop-up rig.
All you need to tie the pop-up rig is a roughly 10” coated hooklink, a piece of shrink tube, a size 4 to 6 wide gape carp hook, a 15mm to 18mm pop-up, as well as a split shot, a boilie stop, an anti-tangle sleeve, a quick change swivel and about 5 minutes of your time.
Follow this step-by-step guide to learn how to easily and quickly tie a pop-up rig that will catch you a lot of carp.
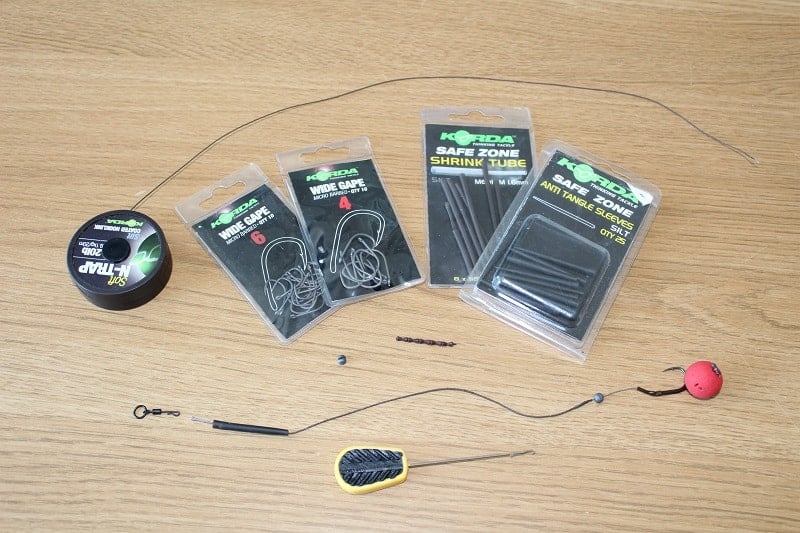
QUICK SUMMARY: Here is the essential end tackle that is needed to tie the pop-up rig. You can find all of it on Amazon if you want to take a closer look:
This is really all you’re gonna need to tie your own pop-up rig! If you want to know exactly how to tie this effective rig, follow the step-by-step guide below.
After you’ve tied a few of those, you’ll easily be able to create a pop-up rig in under 5 minutes. Let’s get going!
1. Prepare The Hooklink
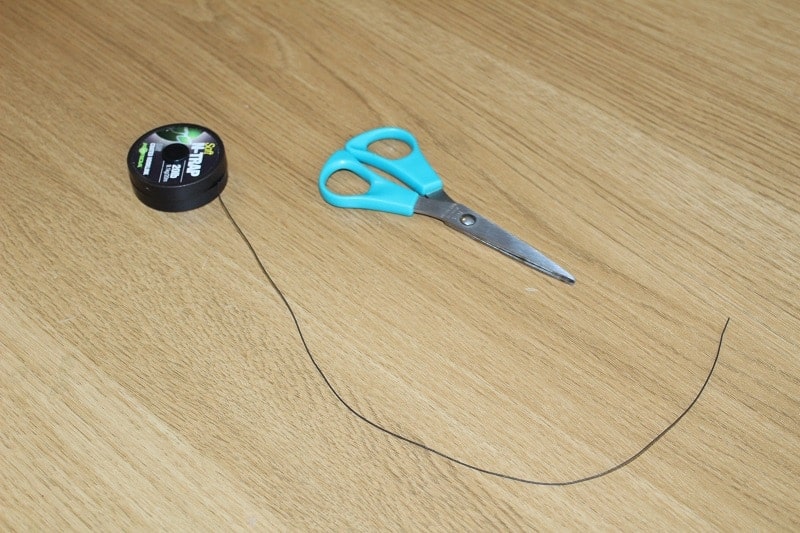

The first thing you will need is a 10-12” long piece of coated braid hooklink. 10” is an average length for a pop-up rig and works in many instances.
But, of course, depending on your venue’s bottom features (silt, weed, gravel, etc.), you will have to adjust the length somewhat.
For thick weed or deep silt, a slightly longer hooklink is recommended, while a shorter one will work just fine for harder and more even bottom structures.
I almost always use the 20 lb Korda Dark Matter Hooklink material for my carp pop-up rigs, it’s pure quality tackle!
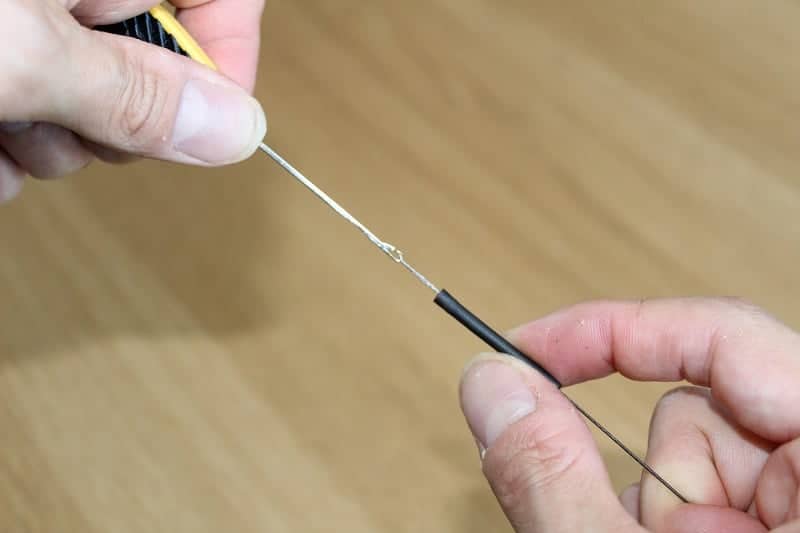
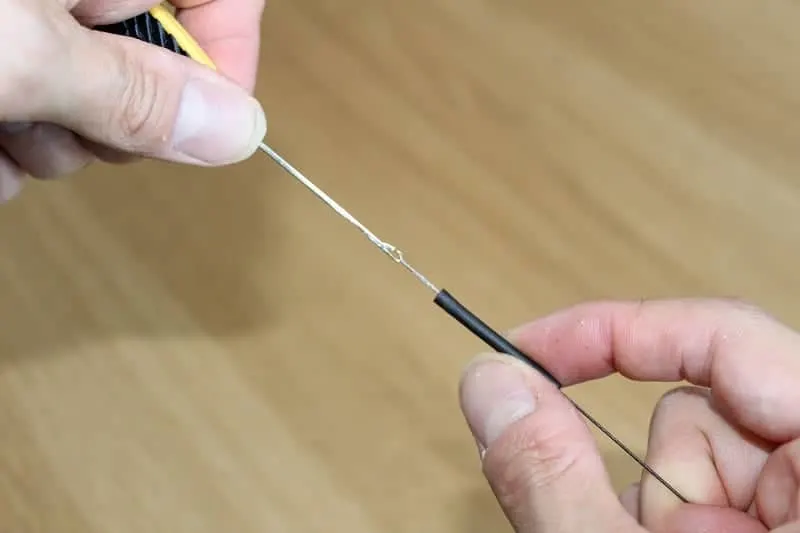
2. Remove 2-3” of Coating
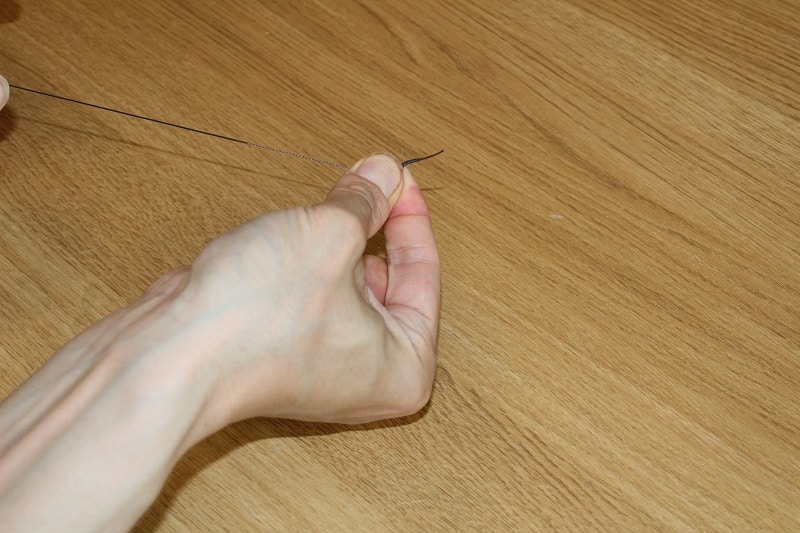

Now, remove around 2-3” of the coating from one end of your hooklink. This can be done pretty easily using your fingernails.
The stripped piece of the hooklink will be used for the hair and the knotless knot. Using uncoated braid makes it much easier to tie the loop and the knot around the hook shank.
And, as you’ll see further down, it will also give your hookbait a little more flexibility and make it less stiff.
3. Tie a Loop for The Hair
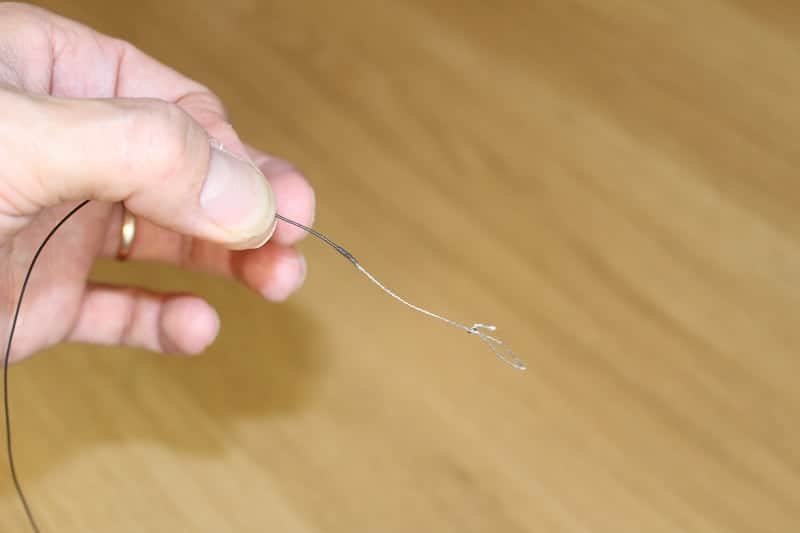
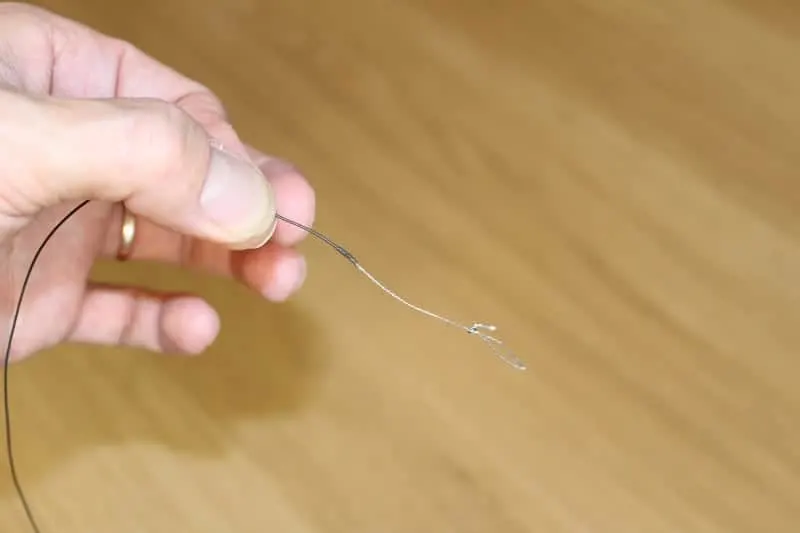
In order to be able to later attach a boilie stop, to keep your pop-up on the hair, tie a rather small figure-eight loop knot at the end of the stripped piece of your hooklink.
Keep going, you’re doing great!
4. Thread The Hooklink Through the Eye of the Hook
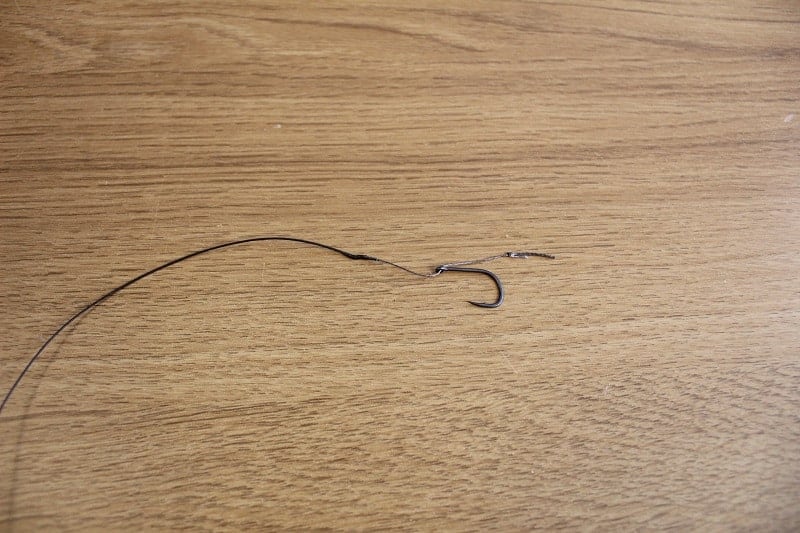
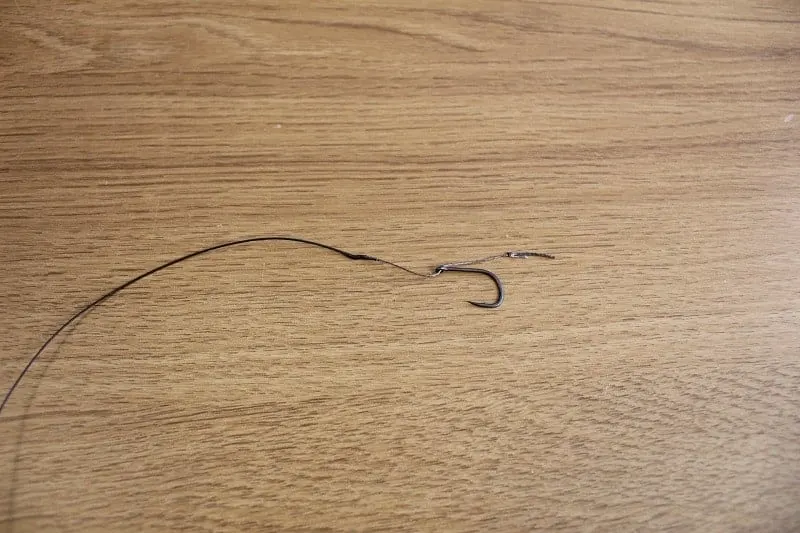
Now, it’s time to bring in your hook! For this particular rig, I am using a size 4 Korda Wide Gape. This size is a perfect match for pop-ups of 16 mm to 20 mm. If you are using smaller hookbaits, a size 6 hook will do perfectly fine.
Take the other end of your hooklink and thread it through the back of the kooks’ eye. Pull the hooklink all the way through the eye until the hook is on the stripped piece of your hooklink, close to the hair loop.
Don’t tie the knotless know just yet, though!
5. Attach Your Pop-Up

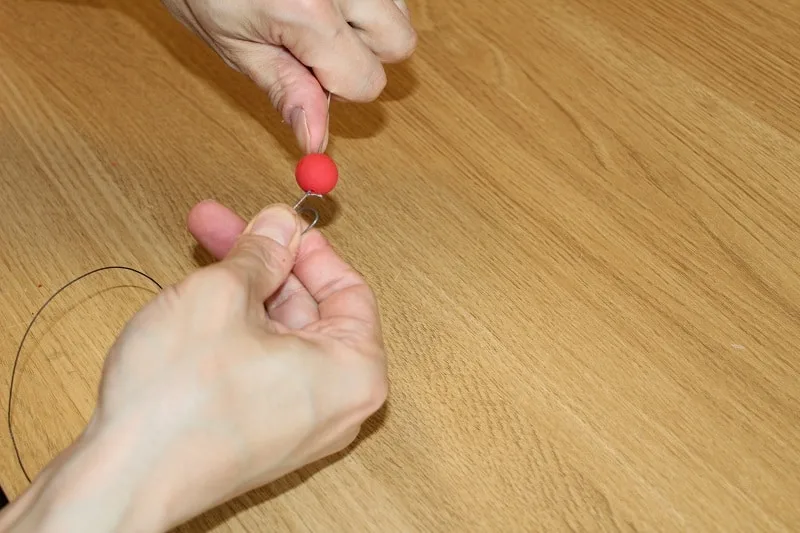
Before you tie the hooklink to your hook, using the knotless knot, thread your pop-up onto your hair with the help of a boilie needle.
I am going to be using a 16mm pop-up, which perfectly aligns with the size 4 hook’s bend.
6. Tie a Knotless Knot Around Your Hook Shank
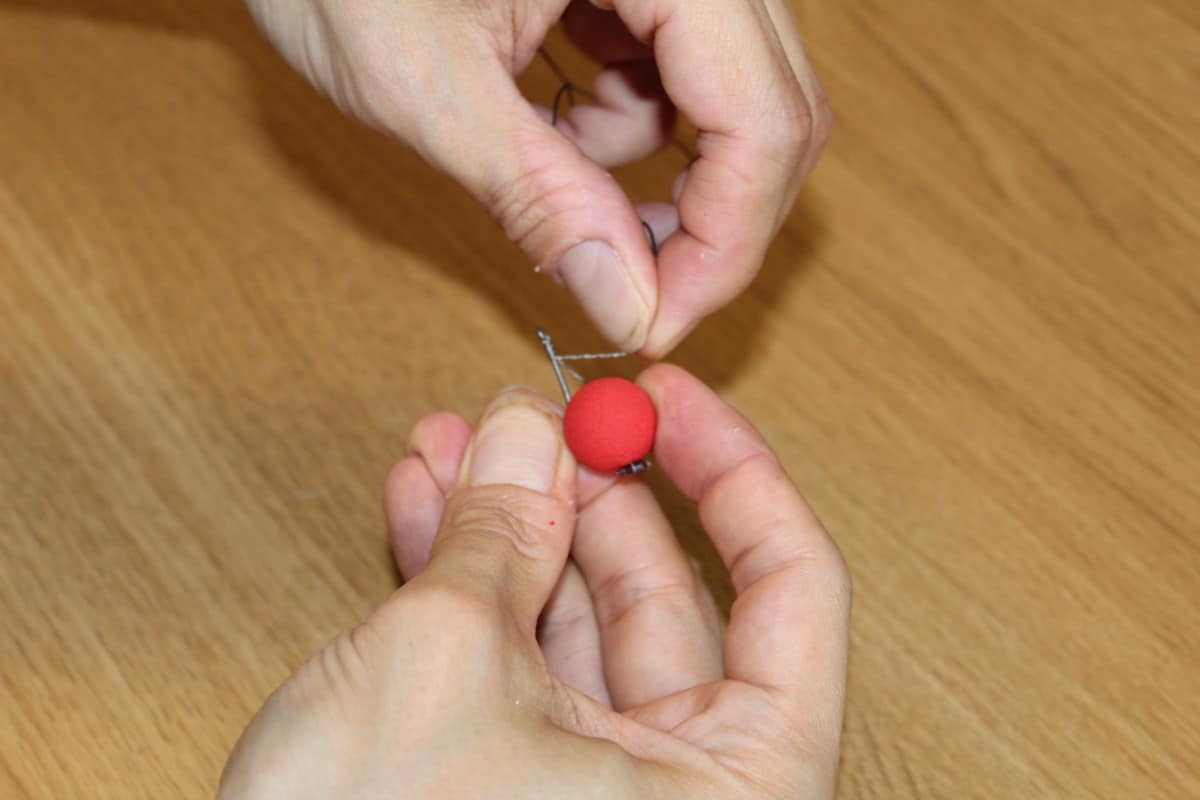

Step 6 is rather crucial! The pop-up must be very close to the bend of the hook! They should not be apart more than 1mm!
When you have found the right distance, it’s time to tie the knotless knot around your hook’s shank.
Insider tip: Make sure that the coating stays away from the hook’s eye. If it gets too close, just pull the coating down your hooklink a little further.
Turn your hooklink 5-7 times around the shank and hair, and then thread the end of the hooklink, once again, through the back of the hook’s eye.
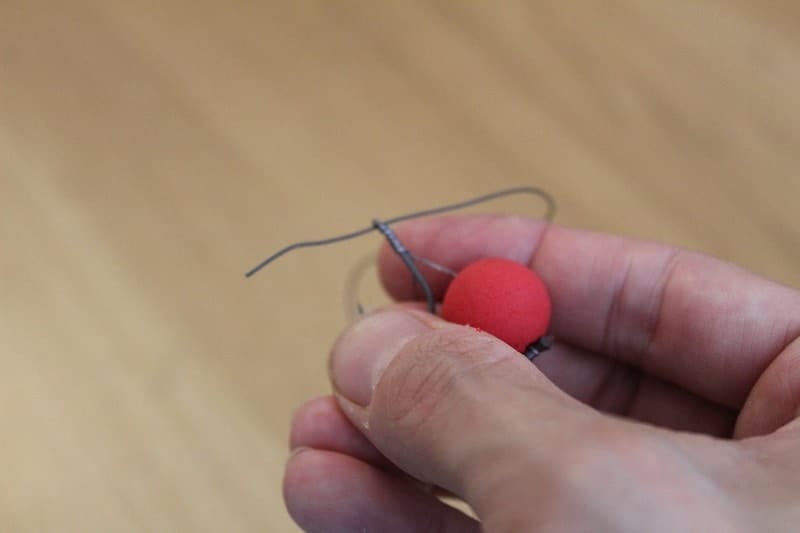

Thread the hooklink all the way through the eye and then draw it tight so that the knotless knot will tighten itself around the shank.
Good job, you’re almost done!
7. Thread The Shrink Tube onto The Hooklink

The next step is to take a small piece of shrink tube, roughly 1-1.5′‘ in length, and to thread it onto your hooklink all the way down to your hook.
Thread it over the hook shank until it is very close to the pop-up. Once the tube is shrunk, it will lock the pop-up tightly to the shank., which is exactly where you want it to be!
8. Boil the Shrink Tube
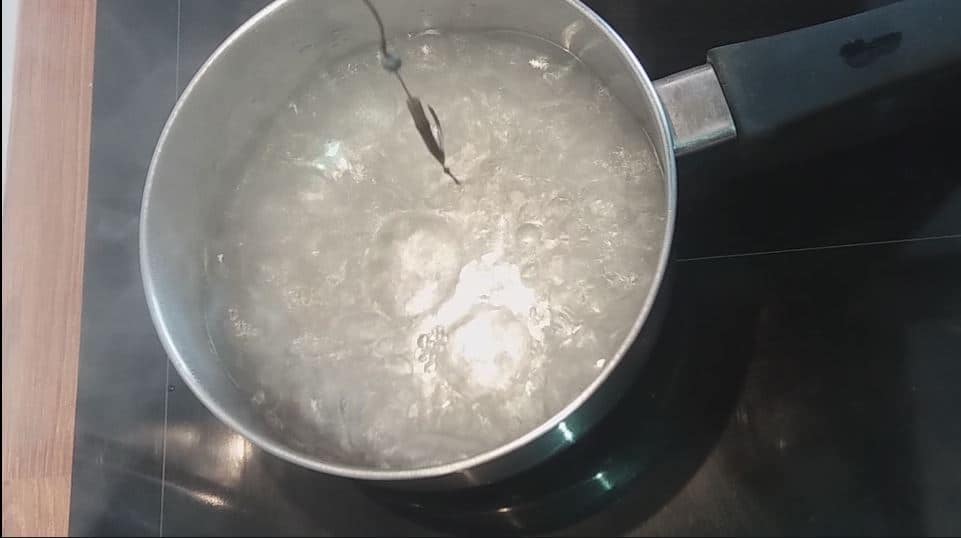
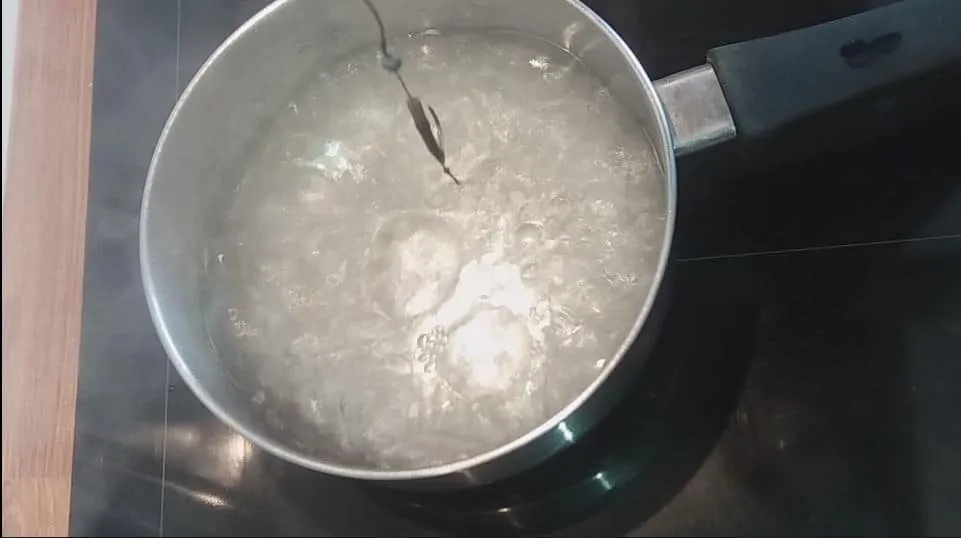
Now, your pop-up rig will take a quick bath in boiling water.
Personally, I like to take off the pop-up at this point, as I don’t want it to be damaged or lose any of its flavour or buoyancy in the hot water, even though it’s only for a couple of seconds. It’s no must, though!
Once the water is boiling, simply dip your hook with the shrink tube into it for about 5-7 seconds. This will be enough to cause the tube to shrink and tighten around your hook shank.

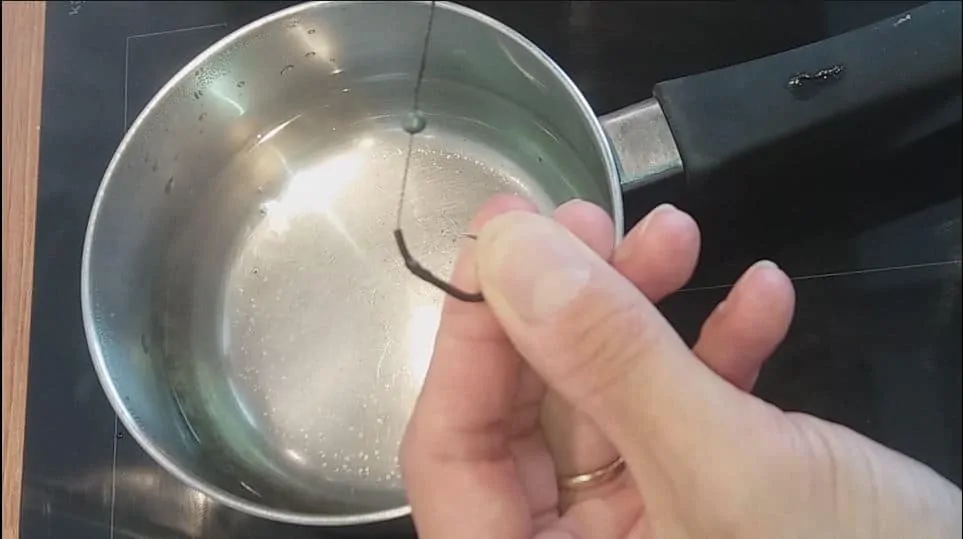
Then, lift it out again, and now, quickly, bend the still flexible shrink tube just a little bit by pulling the hooklink inward towards the point of your hook.
Hold it there for another few seconds and wait until the tube has stiffened.
This extra little bend of the tube will increase the hook’s bolt effect, as it sort of expands the hook’s natural bend.
9. Attach a Split Shot to The Hooklink
The next step is to attach a very small split shot, or piece of tungsten, to the remaining stripped piece of your hooklink, just above the coating.
This will keep your rig on the bottom, allowing it to pop up only a few inches, depending on where on the hooklink you attach the shot.
Once again, it all depends on the bottom structure of your swim. For thick weed or deep silt, attach the split shot a little further up your hooklink, which will cause the pop-up to be a little higher up.
For harder and more even bottom structures, place the shot further down on your hooklink, near the hook. This will keep the pop-up very close to the bottom.
10. Thread an Anti-Tangle Sleeve onto the Hooklink
Now, your rig is basically ready! All that’s left to do is to thread an anti-tangle sleeve onto your hooklink so that your rig won’t wrap itself around the lead or mainline.
11. Attach Your Hooklink to a Quick Change Swivel
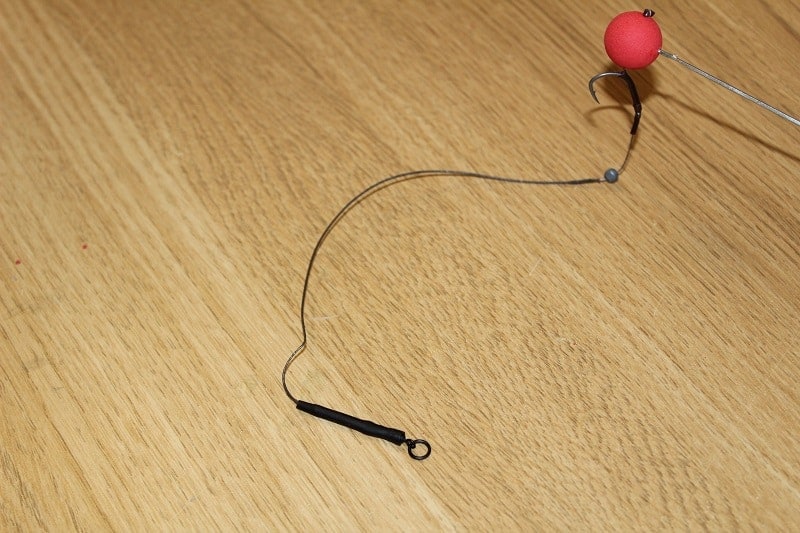
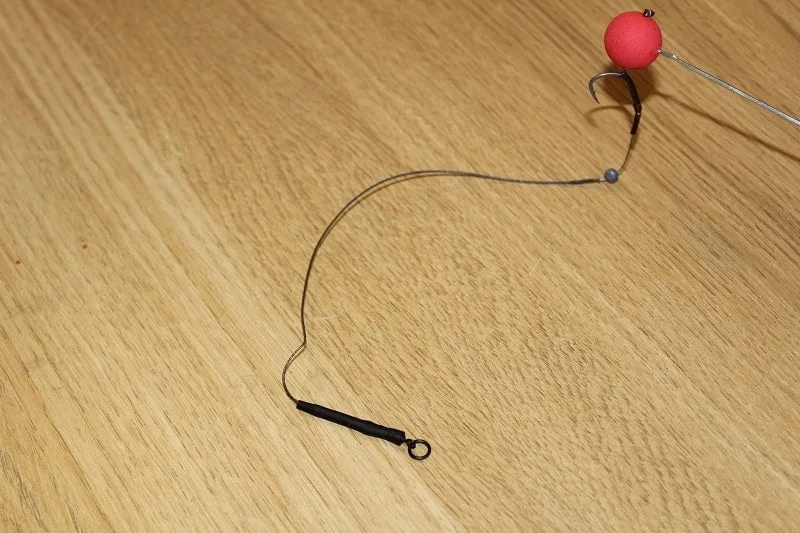
Finally, tie a simple figure-eight knot at the end of your rig, creating a loop that you can easily attach to a quick change swivel. Pull the anti-tangle sleeve over the swivel, and that’s it!
Congratulations, you have just tied your first pop-up rig!
Using a quick-change swivel allows you to switch to a shorter or longer rig, if needed, and to easily thread a PVA stick onto your hooklink.
If you prefer using a normal barrel swivel, attach your hooklink to it with the improved clinch knot.
Bonus Tip For Weedy and Silty Bottoms: Rig Foam
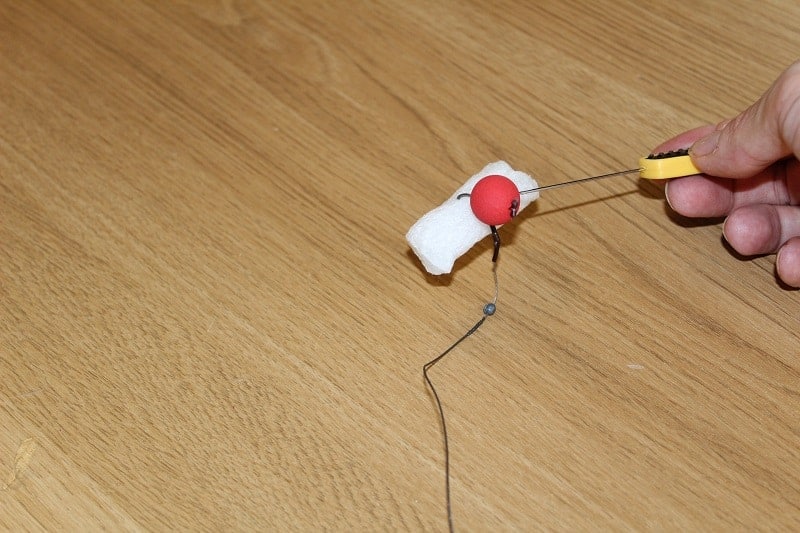
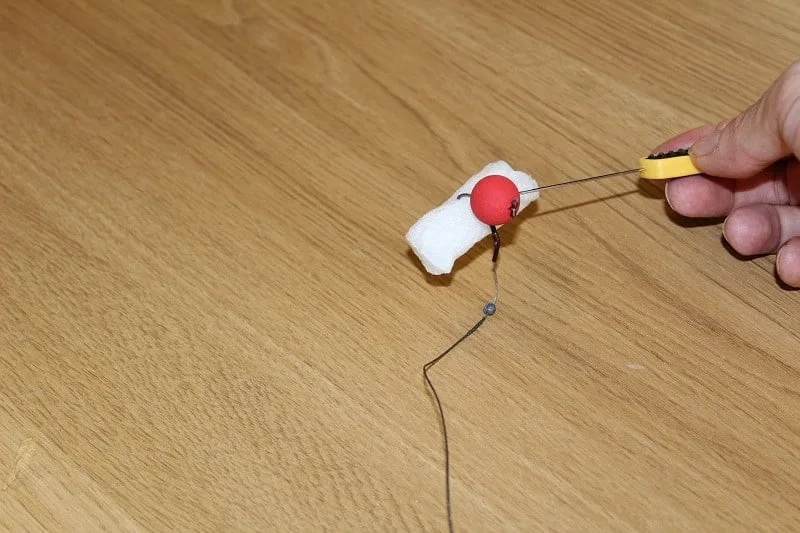
Many anglers hesitate to use the classic pop-up rig over weed or silt as they fear that the weight of the split shot will drag the entire rig down and into the bottom, making it harder for the carp to detect.
That fear is, however, totally unjustified! First of all, if you find the perfect balance between pop-up and shot weight, your rig will naturally sink to the bottom very slowly, placing itself perfectly on top of the weed or silt.
Second of all, if you still feel that you want to ensure a soft landing for your rig, simply attach a rig foam to your hook!
This way, your hookbait will always be placed perfectly and can enjoy high visibility, no matter how short or long your hooklink may be!
Essential Tackle Tips
If you’re looking for solid and reliable carp fishing equipment, these tips might be useful for you.
The following tackle is of top quality and sells at a very decent price on Amazon.
I have been using this setup myself for many years and have caught plenty of big carp with it.
Rod: Daiwa Black Widow
A very strong and beautifully made 12ft 3lb carp rod with a ton of backbone and a great bend. Casts anything up to 5 oz extremely well and lets you navigate and control your fish smoothly and effectively. Fits both open and snaggy waters.
Reel: Shimano Baitrunner DL 6000
A reliable standard-sized baitrunner reel that works great for short to medium-distance carp fishing. Loads around 200 yards of 15-18lb monofilament mainline. Handles any wild run very smoothly! Fits the Black Widow rod perfectly.
Mainline: Daiwa Sensor 15lb
One of the strongest and most durable monofilament lines out there! Sells at a very good price and will last you for many fishing trips. Has just the right amount of stretch to perfectly hook and fight every fish.